
Ava loved her and promptly named her Ava.

At the store getting her birth certificate
Then like so many other birthday presents she got tossed aside and forgotten about. It was until we were watching Project Runway last week (because what 7 year old doesn't love that show) that suddenly I noticed Ava was sitting next to Ava and she was chattering about sewing her outfits. I thought now seemed like a good as a time as any to teach her to sew.
Her first ideas were shoes and pants. I suggested a skirt and set her to sketching.

We settled on view 3 a skirt with fruit
I said I would take her to the store to pick some fabric but that we should first have a look at what we had at home. I got out a small selection of my large stash of cottons. As soon as she saw the Barbie fabric all notions of fruit were gone.

Ava helping to choose
Originally I drafted an A-line skirt pattern but then decided it needed to be as simple as possible. I didn't want to overwhelm her and have her give up. I drew a rectangle. The width was 1.5 x waist. The length was the length I wanted the skirt to be, around 10cm. I then added 1.5cm seam allowances and 1.5 cm hem and casing allowance. Cut it out and voila - a pattern!

A pattern is born! (It was actually square in real life)
My motto for the day was "Simple, simple, simple". I just went with the flow and what we had on hand. We've only moved recently and I didn't want to have to keep stopping and starting to find things. So first things first she traced the pattern onto the fabric (with biro). The pattern was held down with batteries.


They weren't perfect but that didn't matter

Concentrating on cutting
Next it was time to pin and sew the side seams. I got her to run some practice fabric through the machine first. I thought we would have to do this several times but she got the hang of using the fabric guide, pedal and reverse button really quickly!

Pinning

Sewing the hem
There are no more photos of the sewing process because we were too busy concentrating. Basically she sewed the side seams and then I pressed them open. I then pressed the hem and she sewed it. I pressed the casing then she sewed, leaving a gap for the elastic. I then threaded the elastic and she sewed it shut!
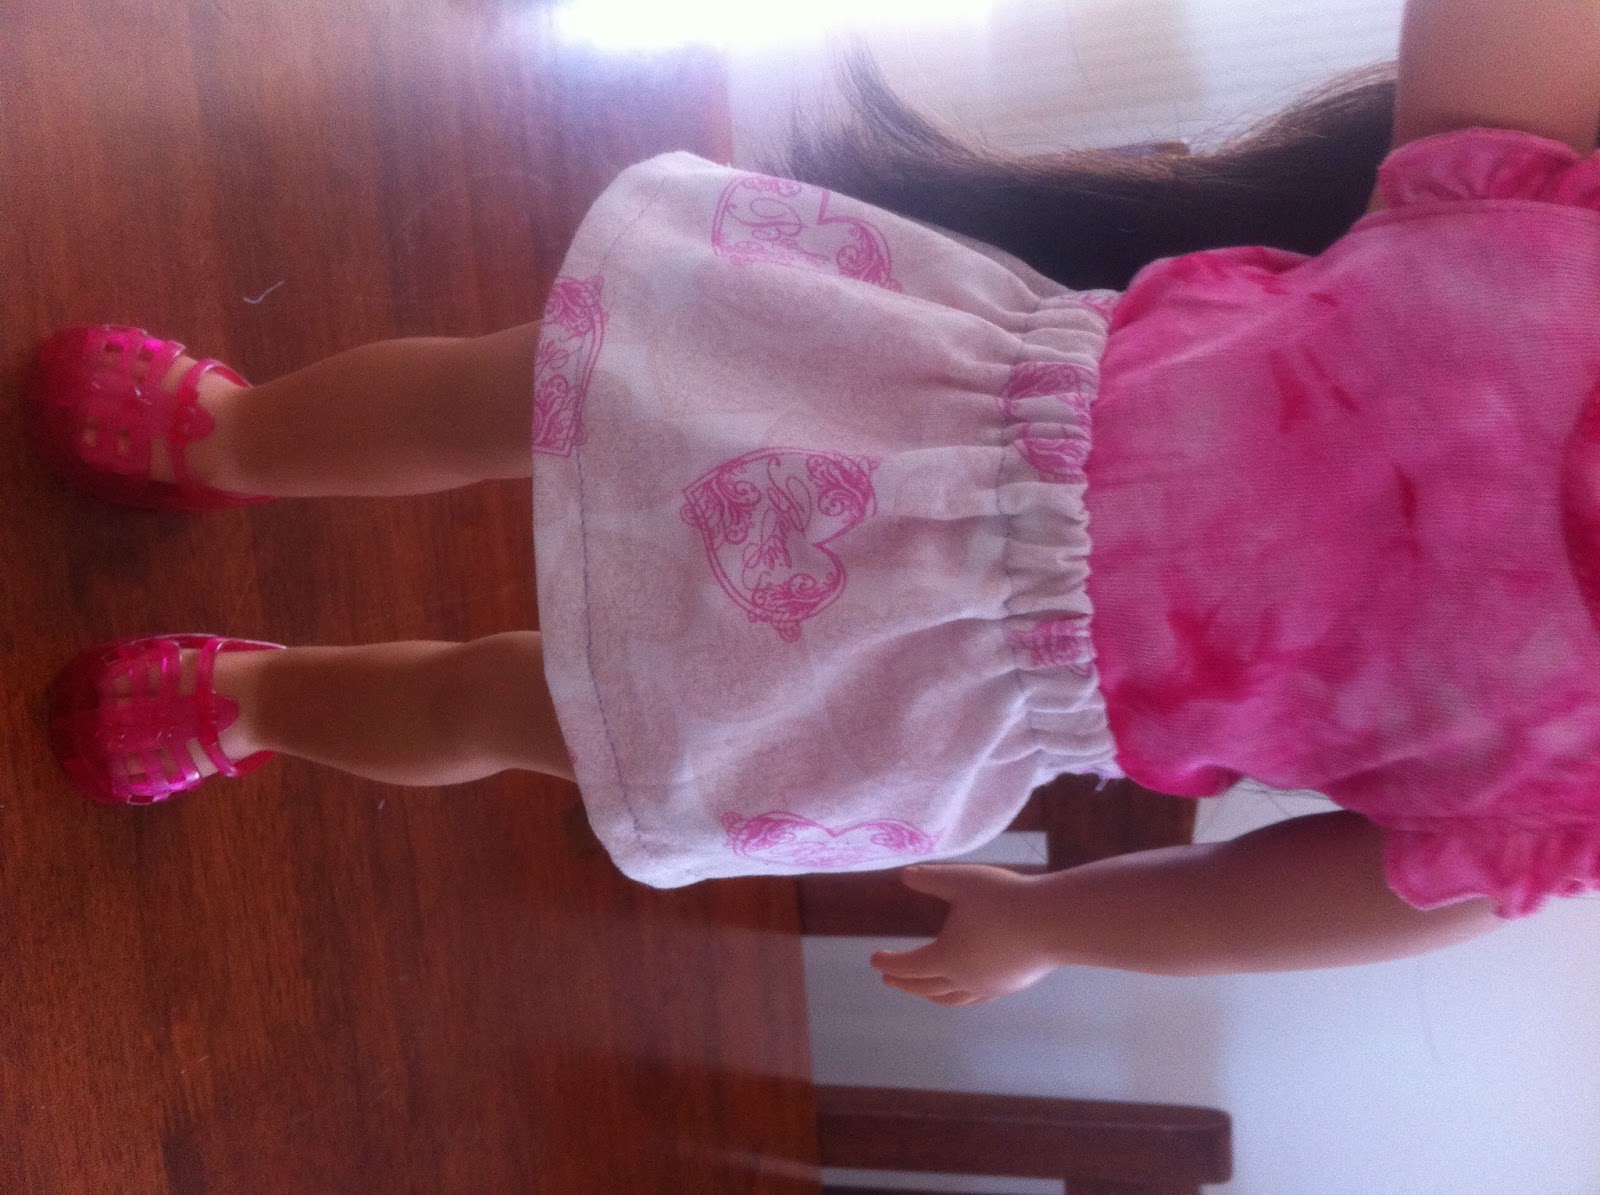
The finished product!
This was by no means a perfect exercise but it was fast, simple and a great introduction to sewing. I honestly don't believe you have to do everything perfectly when you're learning. Getting caught up in perfect technique can be really limiting. It took a lot of patience for me to hold back on doing it the "right" way. In the end though she is so proud of what she achieved that she wants to do more. That is success in my eyes!
Throughout the process we talked about the way we were doing things vs. correct technique. Some things that we will try as we go along
- Not using biro to trace!
- ZigZagging the seams
- Letting Ava do some pressing
- Folding under the hem and casing
She's already talking about what we are going to sew this weekend :o)
I'm so proud of Ava for making this!! Sewing must be in her blood :)
ReplyDelete